


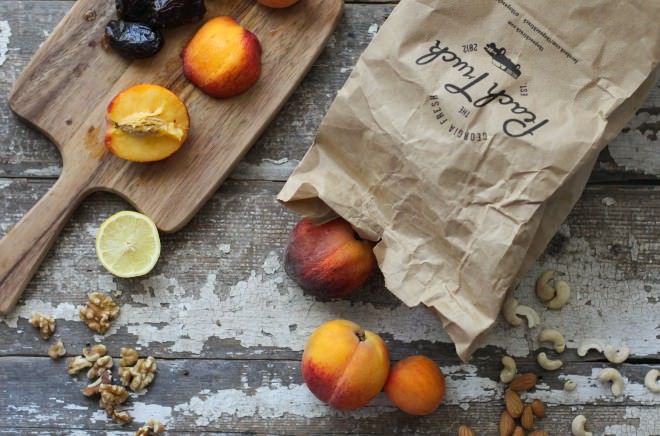
 One of my favorite fruits in season in the summer months are peaches, hands down peaches. If you’ve been keeping up to date with my daily life Instagram or Facebook then you know I’ve been all over these peaches for the past couple of weeks. On a farmers market trip last weekend, I picked up the classic brown paper bag filled with the best peaches I’ve ever tasted (no exaggeration here) from the Peach Truck. I kept the brown paper bag filled with gorgeous peaches on my countertop for a couple of days to get them perfectly ripe, and in the meantime I was filled with inspiration of what I was going to make -the Raw Peach Tart idea came incredibly naturally. Since I like to keep most of my diet light on digestion and raw especially in the warmer months, this was perfect to celebrate all the flavors of these peaches, untouched.
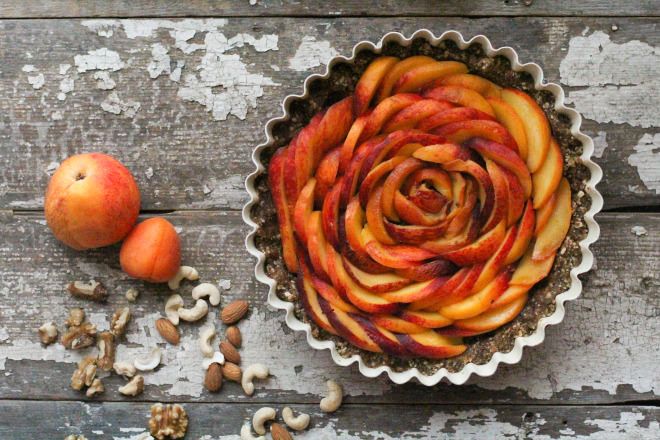
This Raw Peach Tart is perfect for the warmer months when you want a cool treat that’s light and refreshing. When I think of desserts during this time of year in the Nashville heat, my body craves something slightly sweet but also chilled. This recipe satisfies both! It’s also a great dessert to bring to summer BBQ’s with friends, to share something new.
Peaches can be a tricky fruit to choose from the market or store. Typically you purchase them relatively hard and can allow them to ripen on your countertop or more quickly in a brown paper bag. If you’re lucky, you get peaches that are super juicy, sweet, and begging to be eaten. A quick tip for picking peaches (and any fruit) is to use your nose. A fruit is ripe when you can smell the fragrance when holding it up to you nose. I’ve said it before and I’ll say it again, your nose knows.
Why a raw crust? This raw crust contains seven simple ingredients, seven! Compare that to a store bought pie or tart crust and you’re looking at around twenty ingredients* including hydrogenated oils (eek!), enriched white flours, lard, food dyes (huh?), and preservatives galore! Twenty ingredients that your body has to process, digest, and absorb/excrete. Also, the only preservative used in this recipe is your freezer or refrigerator. The crust is filled with chewy dates, almonds, walnuts, and cashews–sometimes I prefer to use pecans instead of cashews, so you have flexibility here– all of which combine to create a chewy, yet hearty enough crust to cradle the raw peaches. I’d much rather nourish my body with a healthy, raw, easy to digest, fiber rich, and nutrient dense dessert. An added bonus to eating this for dessert, it won’t leave you feeling lethargic afterwards and you can keep on with enjoying your summer evening.
You may be thinking it’s going to take you a lot of time to make this dessert, but trust me it looks fancy with it’s presentation, but it’s incredibly simple. The only time consuming part of this recipe is allowing the crust to cool for at least two hours in the freezer or overnight in the refrigerator, which allows the crust to become very firm and a lot easier to work with and layer the peaches on top. Decorating this raw tart is where you can let your creativity shine; you don’t have to decorate in this concentric circle design, you can simply cut the peaches in small cubes, lay the slices flat, etc., whatever you enjoy!
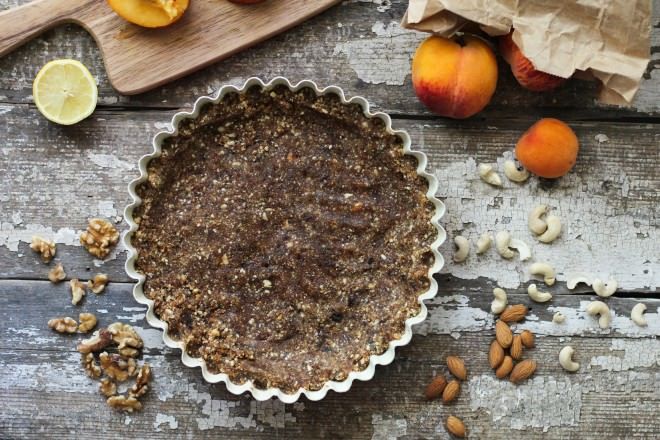
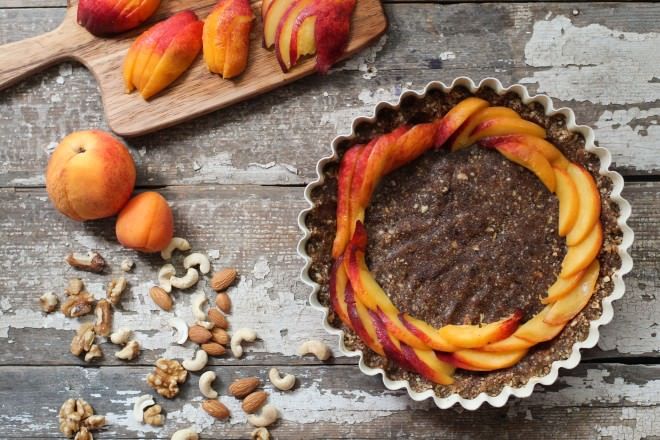
This recipe is also wonderful because it can be made in one large tart pan as pictured above or you can use mini tart pans, check these fun ones out here and here. This tart pan was one I had on hand, but mini tart pans would be perfect for individualizing desserts at a gathering, party, BBQ’s as mentioned above, or special occasions. Pictured above is the first step in making the crust before putting it in the fridge or freezer to cool. The next picture below is step 2 where you can start to place the sliced peaches in a circular design.
- CRUST//
- 1 cup dates, pitted
- 1 cups cashews, raw and ground
- 1 cup walnuts, raw and ground
- 1 cup almond, raw and ground
- 1 tsp. ground cinnamon
- 1 Tbs. lemon zest
- 1/2 tsp. sea salt
- FILLING//
- 3 cups fresh peaches, sliced (about 4 peaches or until your tarts are filled!)
- 1 juice of lemon
- local honey drizzle on top (optional, it should be sweet enough!)
- CRUST//
- Grind all nuts in a nut grinder (coffee grinder that’s clean of course) or Vitamix until finely chopped. It’s okay to have some chucks!
- Combine all the CRUST ingredients into your Vitamix (or high speed blender or food processor) until well combined.
- This “dough” will be very sticky (similar to my Almond Coconut Date Balls), but should hold together when pressed in between your fingers. If your mixture is too wet or moist simply add more ground nuts.
- If you’re using mini tart pans, divide the mixture evenly.
- Using your tart pan (10-12in.) or mini tart pans, gently press the Nut/Date dough into the pan and up the sides. Press firmly until a crust is formed.
- Chill in the freezer (at least 2 hours) or refrigerator (overnight).
- FILLING//
- Cut the peaches in half, remove the pit.
- Thinly slice the peaches long ways (as shown in the picture), and arrange in a circular pattern or simply lay flat.
- Sprinkle with fresh squeezed lemon juice.
- Serve immediately or wrap tightly with clear wrap and keep in the refrigerator.
- ENJOY!
NOTE // If you have any nut allergies to the ones used in this recipe, simply use seeds instead of the nut that you’re allergic to (for example, sunflower seeds, pumpkin seeds, or any other nut that you’re not allergic to).
Hope you all enjoy!
xo McKel
*comparison of a widely known refrigerated pie crust dough.